
How To Winterize Your Lawn Sprinkler System
Many of us ignore our automatic lawn sprinkler system throughout the year, tending to it only when it breaks down. But as fall gains a foothold, it’s the perfect time to prepare your sprinkler system for winter. Following an annual sprinkler system maintenance routine will help to prolong the life of your sprinkler system and prevent expensive service and repair calls.
If you live in a warm or temperate climate, winterizing your lawn sprinkler system may not be necessary at all. If you live in a northern climate, you will want to take steps to keep your lawn sprinklers from freeze damage. The steps you take to winterize your sprinkler system depend to an extent on how your system was installed and the type of sprinkler nozzles or heads you have. Some systems are buried just under the ground surface. These will need extra care in winterizing. Others are buried the same as potable water lines, i.e., below the frost level for your area.
Winterizing the sprinkler system
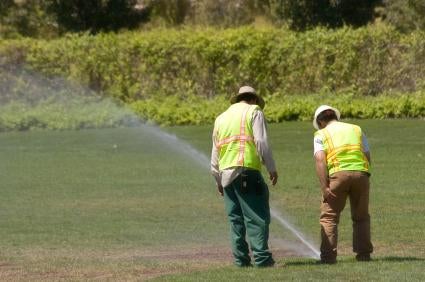
Preparing your lawn sprinkler system for winter can prevent costly repairs
Preparing your lawn sprinkler system for winter can prevent costly repairs
- Shut off the system supply valve, usually located in a box underground.
- Your lawn sprinkler system should have been installed with a drain valve usually placed just downstream of the backflow preventer.
- Open the drain valve to allow the system to drain. If your system does not have a drain valve, open all the test cocks on the backflow preventer assembly to allow the system to depressurize and drain.
- Remove one or more nozzles or sprinkler heads from the farthest end of the sprinkler system to vent the system and help it to drain thoroughly. If you have an extensive sprinkler system or one with more than one zone, you may want to remove at least one nozzle or head in each zone.
- If your system runs up and down in an uneven lawn, you may need to purge the underground sprinkler lines with air pressure.
- To do this, remove all the nozzles possible and adapt an air hose to fit the ½” or ¾” pipe thread where the nozzles screw in.
- Attach the air hose to the system, allow pressure to build up on the air compressor to at least system operating pressure or 80 psi. Then open the air valve on the air compressor and let the air blow all the water out of the system.
- For a small system this usually only takes a quick blast. For larger systems or zoned systems, you may need to hook up the air compressor in multiple locations.
- Once you are certain that as much water as possible has been drained out of the system, replace all the nozzles.
- Leave the drain valves opened until spring.
- Deactivate the automatic timer.
Tips
If you did have to open the test cocks on the backflow preventer, close them again after the system has drained down to prevent debris from entering the backflow preventer.
Have the backflow preventer tested each spring to ensure it is operating properly.
Place a blanket of fiberglas over the valves and piping in each lawn sprinkler control box to keep them from freezing. You can also use newspapers, packing peanuts, old blankets, etc.


Discuss this and other Home Improvement Topics in our How To Forum